Making a GTK application in Haskell, part 1
In this series, we are going to build a todo-list application using Haskell, GTK 4, and the Adwaita library. Adwaita will provide us with many useful widgets and styles. Let's dive in!
This series' intended audience is intermediate Haskellers, with development experience with the language.
GTK 4, Adwaita
Adwaita is a library of GTK components that serve as the design language of the GNOME project. In short: Every decision that the GNOME project has made in terms of accessibility and style (the Human Interface Guidelines, HIG) is encoded in libadwaita.
Libawaita gives you many features: for instance it lets you create applications with responsive design, which are recolored at runtime when the desktop switches between light and dark themes.
Haskell and GTK
Throughout this series we will use the haskell-gi toolkit, which auto-generates Haskell bindings from GTK libraries, and allows us to get a Haskell interface to GTK that you can still relate to the C API.
To keep this post readable, the code that you will see will not be complete,
in order for me to underline the main concepts.
You can find the whole project at https://github.com/Floreal-Technologies/adwaita-todo.
Your first window
To begin, here is a self-contained example of the structure of a GTK 4 / Adwaita application.
Let's create the adwaita "Application" that will handle resource management for us (including Adwaita stylesheets, which are pretty cool):
module Main (main) where

import GI.Awd qualified as Adw
import GI.Gio qualified as Gio
import GI.GTK qualified as Gtk

main :: IO ()
main = do
  -- The `new X [#attribute := value]` syntax creates a Gtk object
  -- with its properties. The hash syntax is called OverloadedLabels.
  app <- new Adw.Application [#applicationId := "tech.floreal.TodoApp"]
  -- We connect the "activate" signal to the "activate" handler.
  on app #activate (activate app)
  -- We run the main application loop.
  Gio.applicationRun app Nothing
  pure ()

activate :: Adw.Application -> IO ()
activate app = do
  header <- new Adw.HeaderBar []
  toolbar <- new Adw.ToolbarView []
  Adw.toolbarViewAddTopBar toolbar header
  window <-
    new Adw.ApplicationWindow
      [ #application := app
      , #title := "Todos"
      , #defaultWidth := 480
      , #defaultHeight := 640
      , #content := toolbar
      ]
  Gtk.windowPresent window
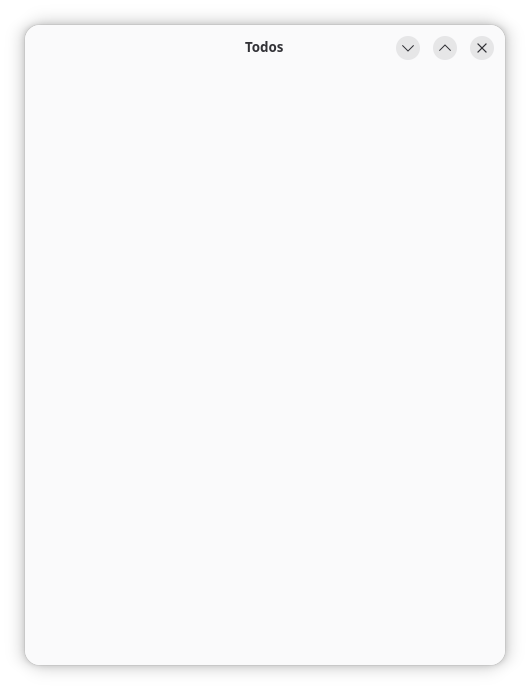
Lo and behold! An empty window that displays "Todos" as its title, and its dimensions are 480 by 640.
Model-View-Update: The Elm Architecture
The Elm Architecture (or TEA) is a pattern for architecting interactive programs. At its core are three concepts:
- Model
- The state of the application
- View
- The way to turn the Model into a user interface (HTML, GTK, etc)
- Update
- The way to update your Model based on Messages
Alongside those concepts we can find
- Message
- An enumeration of all the possible interactions of the user with the application
- Effects
- Not only does the Update function return an updated Model, but it returns also a list of actions to be performed on the side, called Effects.
This approach was broadly popularised by Elm, and lends itself quite well to taming the imperative nature of the GTK toolkit.
The Todo App
Now the time has come to represent our application state and its actions. In the spirit of the Elm Architecture, everything will be modelled as data structures, so that we have absolute visibility on what actions were triggered and what they entail.
The model
newtype TodoId = TodoId Word
  deriving stock (Show)
  deriving newtype (Eq, Ord)

data Todo = Todo
  { id :: TodoId
  , title :: Text
  , done :: Bool
  }
  deriving stock (Eq, Show)

data Model = Model
  { todos :: Map TodoId Todo
  , nextId :: TodoId
  }
  deriving stock (Eq, Show)

-- In our case, the effect here represents
-- saving the todo-list on disk.
data Effect = Save [Todo]
  deriving stock (Eq, Show)

init :: Model
init = Model
  { todos = Map.empty
  , nextId = TodoId 0
  }
The messages
User interactions with the application are modelled as Messages: A known set of actions for which we have clear actions that modify the model.
Let's start with a couple of messages that the user may trigger to update the model:
data Message
  = Add Text
  | SetDoneStatus TodoId Bool
deriving stock (Eq, Ord)
Not much so far, but we will add more as we go.
Updating the model
update :: Message -> Model -> (Model, [Effect])
update message model = case message of
  Add raw ->
    let text = Text.strip raw
        todoId@(TodoId n) = model.nextId
        todo = Todo{ id = todoId, title = text, done = False }
    in if Text.null text
    then (model, [])
    else
      withTodos
        (Map.insert todo.id todo)
        model{ nextId = TodoId (n + 1)}
  SetDoneStatus todoId value ->
    withTodos (Map.adjust (\todo -> todo {done = value}) todoId) model
 where
  -- This is where we determine if our todos have changed,
  -- so that we can save them.
  withTodos f changed =
    let result = changed {todos = f changed.todos}
    in if result.todos == model.todos
         then (result, [])
         else (result, [Save (Map.elems result.todos)])
Let's now open GHCi and try things out:
$ cabal repl
-- Let's add a task to buy leeks
ghci> let (m1, e1) = update (Add "Buy leeks") init

-- This triggers a "Save" effect for an unfinished task
ghci> e1
[Save [Todo {id = TodoId 0, title = "Buy leeks", done = False}]]

-- Let's set the task as done
ghci> let (m2, e2) = update (SetDoneStatus (TodoId 0) True) m1

-- Since the status has changed, we have to save it
ghci> e2
[Save [Todo {id = TodoId 0, title = "Buy leeks", done = True}]]

-- Setting the task to True again does not trigger a Save effect,
-- so the effects list is empty.
ghci> update (SetDoneStatus (TodoId 0) True) m2
(Model{ nextId = TodoId 1
      , todos = fromList [
          (TodoId 0, Todo{ id = TodoId 0
                         , title = "Buy leeks"
                         , done = True})]
      }, []) -- ← empty list!
This is our domain logic, encoded as a sum type of messages and an update function to change the state.
Let us now design our interface.
The View
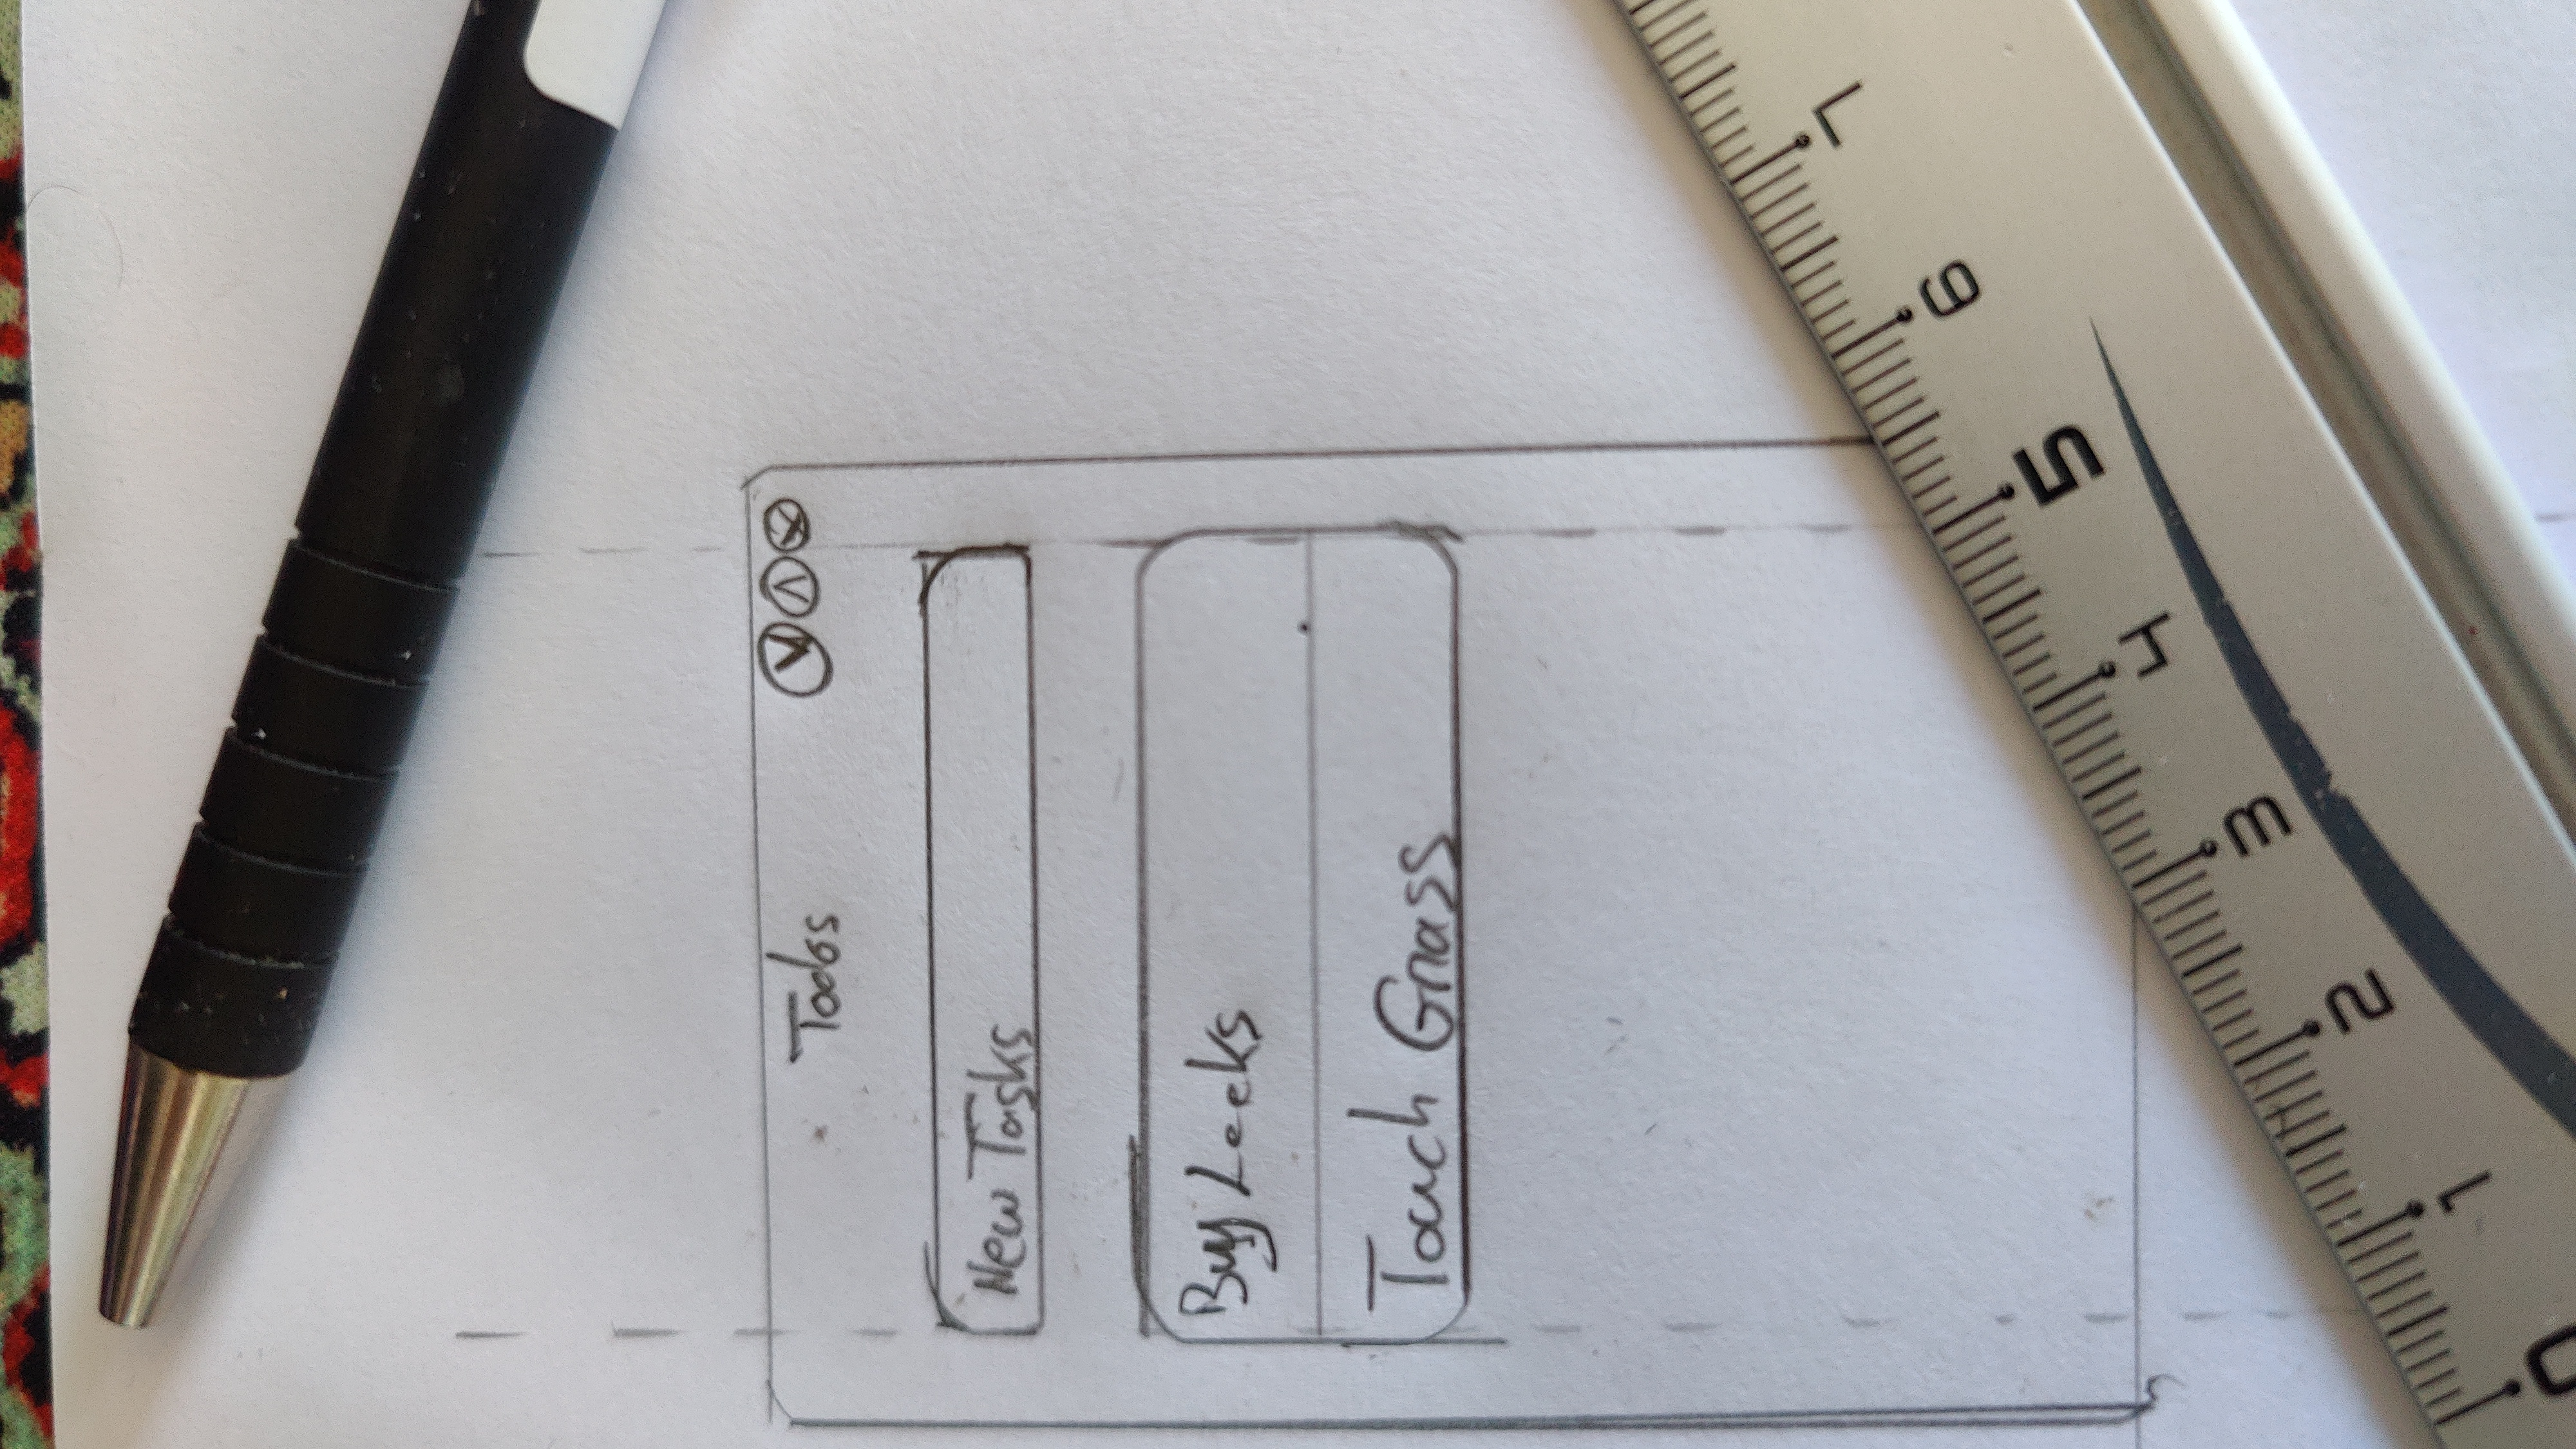
It's always good to write down what your expectations are before starting a user interface.
From experience, design does not immediately follow from data, and so I tend less and less to look at the shape of my data to inform my designs.
Widgets
We are going to make use of several widgets (Click on their name to see a screenshot of what they look like):
- Box
- A box arranges child widgets in a row or column
- ListBox
- A list of rows that can be dynamically filtered and sorted. Useful later to filter on status and sort by age.
- EntryRow
- The entry of a row, with a title, a placeholder text, and an icon to show that it is editable. It is a sublass of ListBox, so it will live in a ListBox.
- ActionRow
- A more restricted version of the EntryRow, which cannot be edited in-place. It can still get action icons, and lives in a ListBox.
- Clamp
- A widget that constrains its child to a given size. Useful to enforce margins so that the background is visible at the edges.
- ScrolledWindow
- This widget makes its child scrollable. Does what it says on the tin.
- ToolbarView
- A view widget containing a page, as well as top and bottom bars.
Time 2 Lego
With those building blocks at hand, let's write down how our widgets connect with each other:
module Todo.View (view) where

-- Imports
-- […]

-- `dispatch` will be defined later in the Runtime module,
-- and is the function that  turns a message into a change
-- of state / model.
view
  :: (Message -> IO ())
  -> Model
  -> IO Gtk.Widget
view dispatch model = do
  -- Here, we define our input row, with its title and a signal handler
  -- to activate the retrieval of our input when it is activated.
  inputRow <- new Adw.EntryRow [#title := "New task"]
  on entry #entryActivated $ do
    text <- Gtk.editableGetText inputRow
    dispatch (Add text) -- This is where we send our "Add" message

  -- EntryRow is a subclass of ListBox,
  -- so we must append our inputRow inside entryBox
  entryBox <- newBoxedList
  Gtk.listBoxAppend entryBox inputRow

  -- The ListBox that will contain our tasks
  todoList <- newBoxedList
  forM_ (model.todos) $ \todo -> do
    row <- new Adw.ActionRow [#title := todo.title, #useMarkup := False]
    Gtk.listBoxAppend todoList row

  -- The main content widget, with various options
  -- to define the margins within its parent
  -- as well as the orientation.
  content <-
    new
      Gtk.Box
      [ #orientation := Gtk.OrientationVertical
      , #spacing := 12
      , #marginTop := 12
      , #marginBottom := 12
      , #marginStart := 12
      , #marginEnd := 12
      ]
  -- Let's not forget to append everything…
  Gtk.boxAppend content entryBox
  Gtk.boxAppend content todoList

  -- The parents of the content widget.
  clamp <- new Adw.Clamp [#child := content]
  scrolled <-
    new
      Gtk.ScrolledWindow
      [ #child := clamp
      ]

  -- A cute little footer for additional information,
  -- like the amount of tasks.
  count <- new Gtk.Label [#label := Text.show (Map.size model.todos)]
  footer <-
    new
      Gtk.Box
      [ #orientation := Gtk.OrientationHorizontal
      , #marginTop := 6
      , #marginBottom := 6
      , #marginStart := 12
      , #marginEnd := 12
      ]
  Gtk.boxAppend footer count

  -- Now let's assemble the header, content and footer!
  header <- new Adw.HeaderBar []
  toolbar <- new Adw.ToolbarView [#content := scrolled]
  Adw.toolbarViewAddTopBar toolbar header
  Adw.toolbarViewAddBottomBar toolbar footer
  Gtk.toWidget toolbar

-- A little helper to create a ListBox with the correct settings.
newBoxedList :: IO Gtk.ListBox
newBoxedList =
  new
    Gtk.ListBox
    [ #selectionMode := Gtk.SelectionModeNone
    , #cssClasses := ["boxed-list"]
    ]
We can't get a lot of visual feedback yet, so you will have to trust that it resembles the pencil-and-paper draft from earlier.
The Runtime
Similarly to the content of the demo from the beginning of the article, this is where we plug the Model-View-Update trio.
We will define two more functions: dispatch and step, and they love each other very much.
dispatch takes a message, handles GTK execution loop priority, and calls step to perform
the model update that will lead to the view update.
step reads the model, calls update (from Model.hs) on it to get the new
model, write the new model, and pass the new model and the dispatch function to
the View. The View gives back the new content as a Gtk widget, and we set this
new content in the window.
Here is the code:
run :: Adw.Application -> IO ()
run app = do
  window <-
    new
      Adw.ApplicationWindow
      [ #application := app
      , #title := "Todos"
      , #defaultWidth := 480
      , #defaultHeight := 640
      ]
  ref <- newIORef Model.init
  let {- rec -}
      dispatch :: Model.Message -> IO ()
      dispatch message =
        void $ GLib.idleAdd GLib.PRIORITY_DEFAULT $ do
          step message
          pure GLib.SOURCE_REMOVE

      step :: Model.Message -> IO ()
      step message = do
        oldModel <- readIORef ref
        let (newModel, _effects) = Model.update message oldModel
        writeIORef ref newModel
        content <- View.view dispatch newModel
        Adw.applicationWindowSetContent window (Just content)

  content <- View.view dispatch Model.init
  Adw.applicationWindowSetContent window (Just content)
  Gtk.windowPresent window
Now, our Main module looks like this:
module Main where

main :: IO ()
main = do
  app <- new Adw.Application
     [#applicationId := "tech.floreal.AdwaitaTodo"]
  on app #activate (Runtime.run app)
  Gio.applicationRun app Nothing
  pure ()
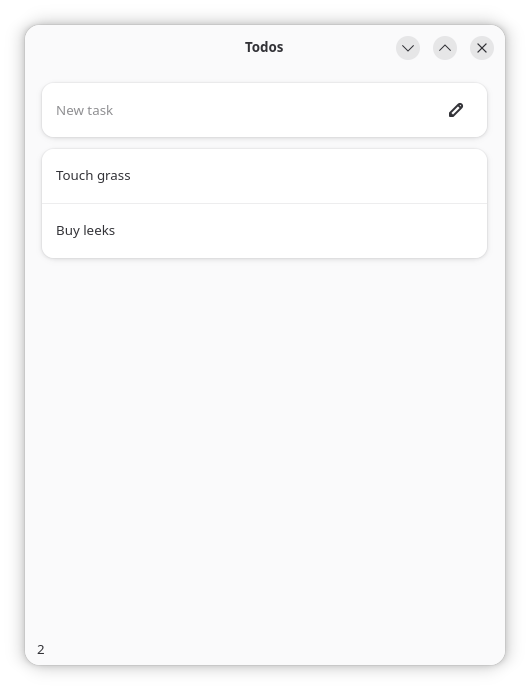
And heeeere we go:
This concludes this article. See you in Part 2 for more features for our Todo List application!